|
A huge thank you to all my fantastic customers and family and friends. I've truly enjoyed making every single special card for you this year and am thrilled that you entrusted me with your special occasions. As a token of my affection, please feel free to use the Christmas card in the pdf below. It will print 2 on a standard letter-sized page. You only need to print it onto white card stock then cut the page in two, fold and give to somebody special. 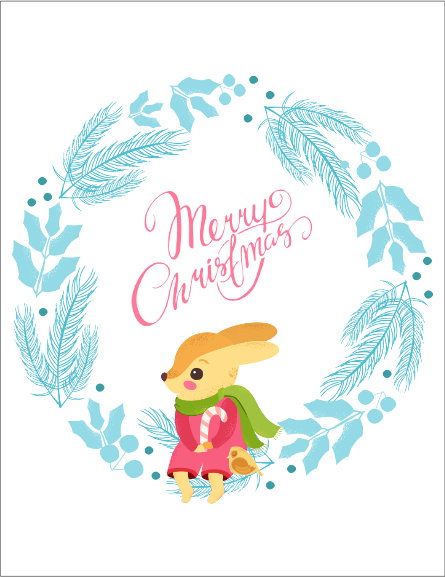 Happiest of holidays to you and I look forward to offering many more cards in the new year. Click the link below to download the free printable card.
3 Comments

Make this fun postage stamp shape using the Silhouette Studio software, which you can download free here. In just a few minutes, you will learn an easy technique for creating all kinds of postage stamp shapes, which you can cut and use in your scrapbooking, cardmaking, and more.
Download the postage stamp file free using the link below.
Subscribe to my YouTube channel to see more Silhouette Studio tutorials.
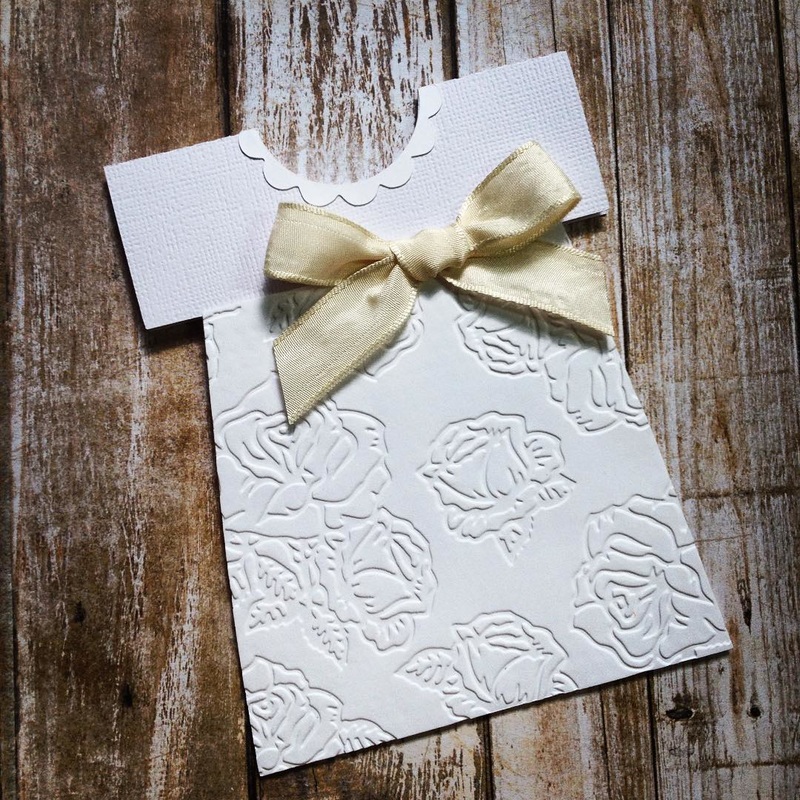
I show you how to use the Silhouette Studio software to create a simple dress-shaped card. This card is idea for a little girl's birthday card, or for a new baby, or as a christening/baptism gown card. You can dress it up with embellishments, add bows, emboss the skirt, add rhinestones, etc.
Here is a sweet and simple christening gown card I created using this technique. You'll notice I didn't add the scalloped bottom to mine, and really sharp eyes will pick up that I used a different scalloped circle to create my collar. I used American Crafts card stock for the base of my card, which has that gorgeous linen texture to it. The bow was wired ribbon, which I pulled the wire from and then tied into a bow. The skirt of the dress was embossed with a pretty rose pattern.
Please subscribe to my Cardamama YouTube channel and stay tuned for more!
Thanks for watching. ~Jozi Want to make your own birthday cards without the hassle of stamps and inks? It's easy with this free set of 27 different birthday greeting tags by Birthday Card Central. Just print on your home printer, cut out, and apply to your own handmade cards. I would love to see any cards you create with these greetings. Feel free to comment with a link to your blog, Facebook, or Pinterest post, or tag me on Twitter as @birthdaycardgal or on Instagram as @birthdaycardcentral. 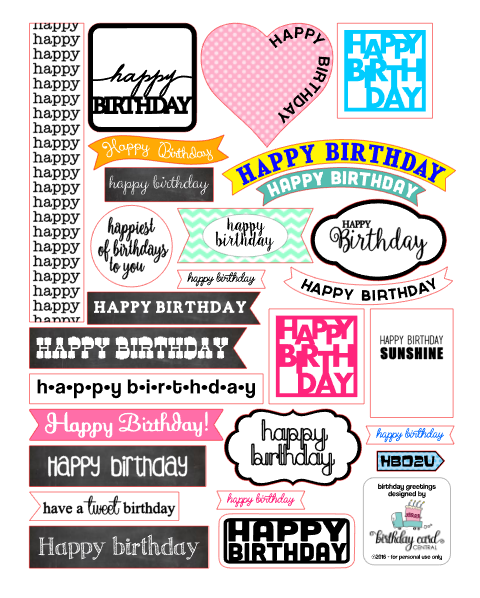 Get the pdf file by clicking on the download link below.
This file is for personal use only and not for resale or commercial use. Feel free to share the link with others so they can enjoy the pleasure of making birthday cards too.
Happy cardmaking! 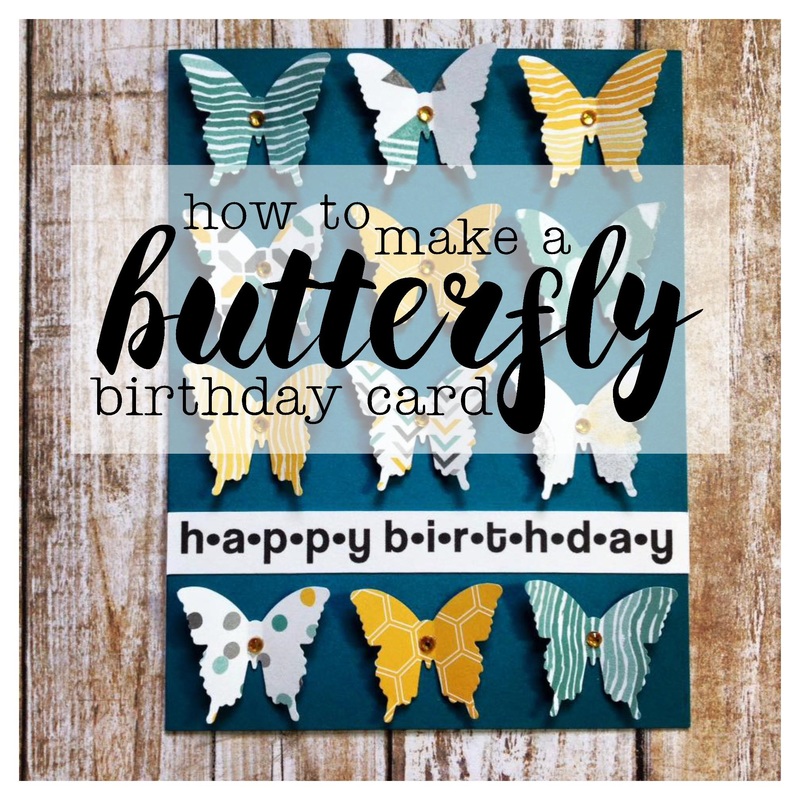 Making a pretty card is easy, even when you don't have a lot of supplies and fancy equipment. The *fanciest* tool in this tutorial is the butterfly paper punch. 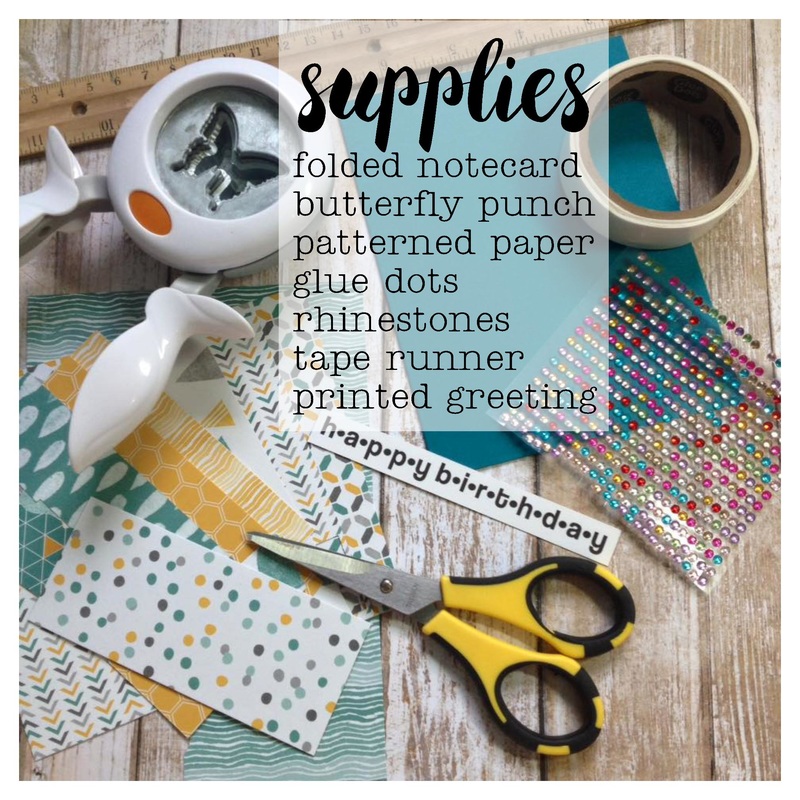 To get started, you need some printed papers (this paper pack is from Stampin' Up), a butterfly punch (this one is from Fiskars), a folded notecard in the colour of your choice (I used a sheet of 8 1/2 x 11 cut in half and folded), scissors, rhinestones (mine are from the dollar store), glue dots, a tape runner, ruler, and a greeting (printed on my ink jet). Let's go! 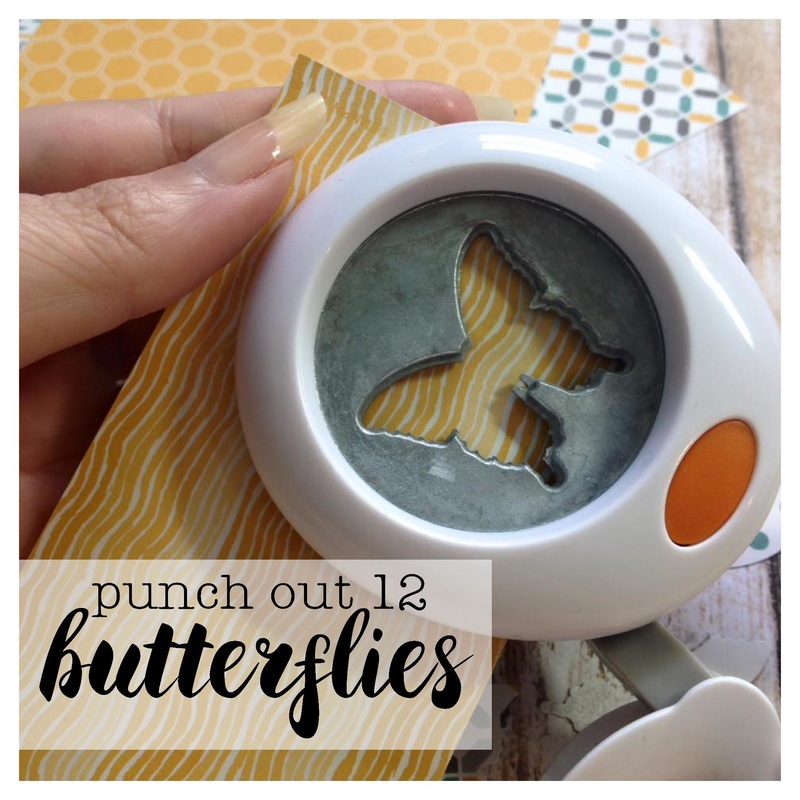 Punch out your butterflies. I used 12 but if your butterfly punch is smaller or larger, just adjust based on what you have on hand. 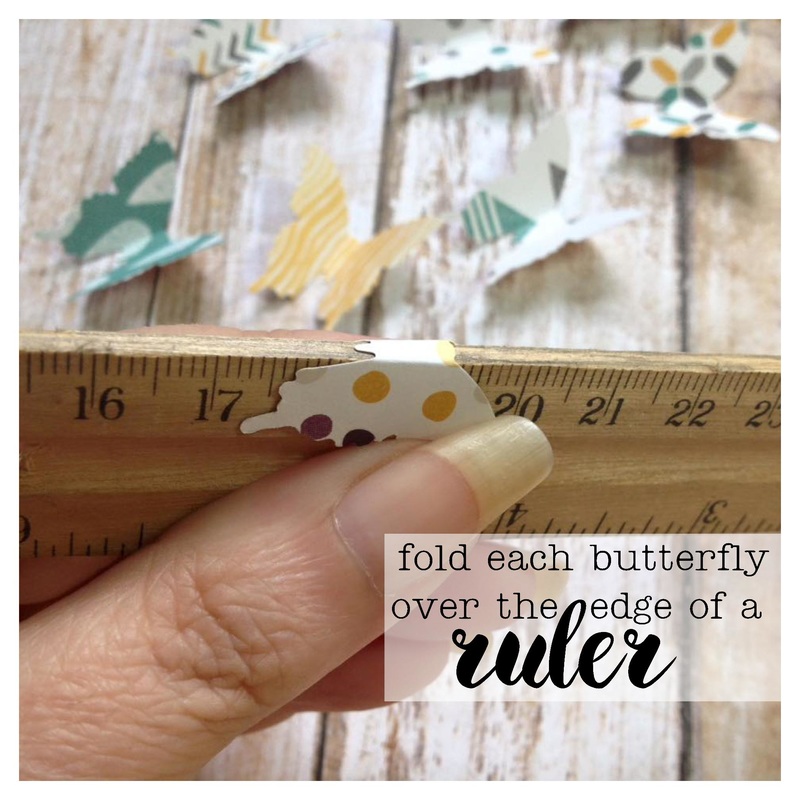 Fold the butterflies over a straight edge, like a ruler. I like them to have a little span in the middle rather than just folding them in two, but you could do that as well. 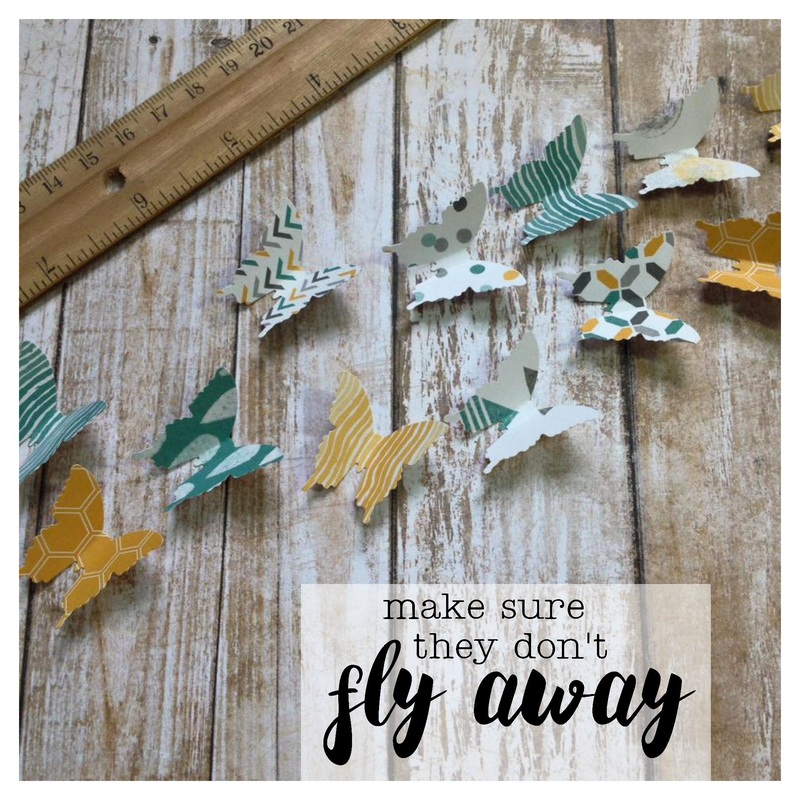 Keep an eye on them or they will fly away. They look all sweet and innocent but they are sneaky like that. 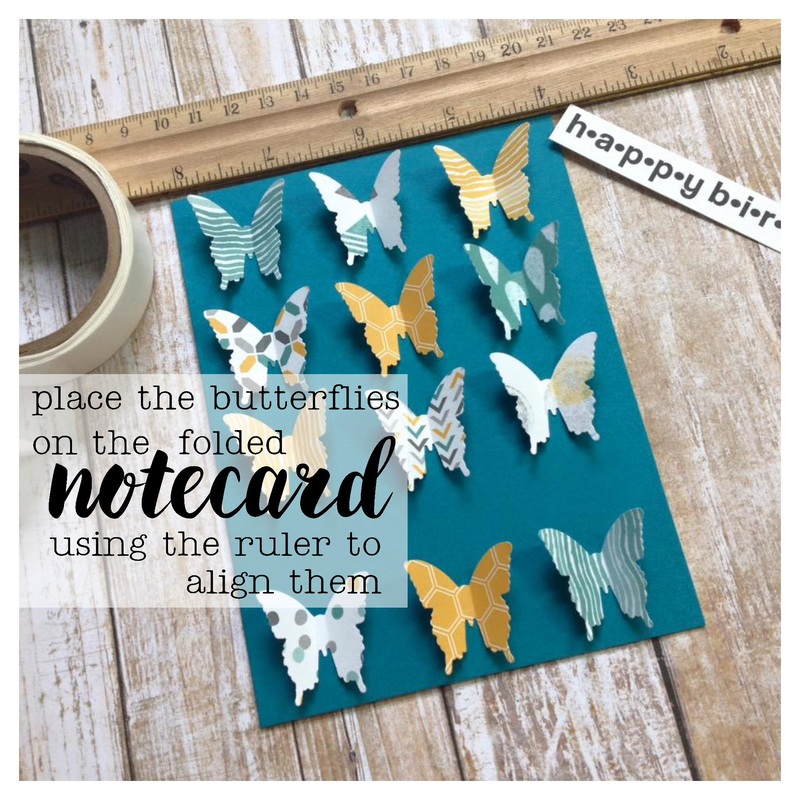 Use your ruler to decide how you will lay the butterflies out on your notecard, leaving room for your greeting tag if you are using one. I just eyeballed this. Perfection is for machines.  Use a glue dot (or even a dab of liquid glue) to hold each flutterby in place on your card. 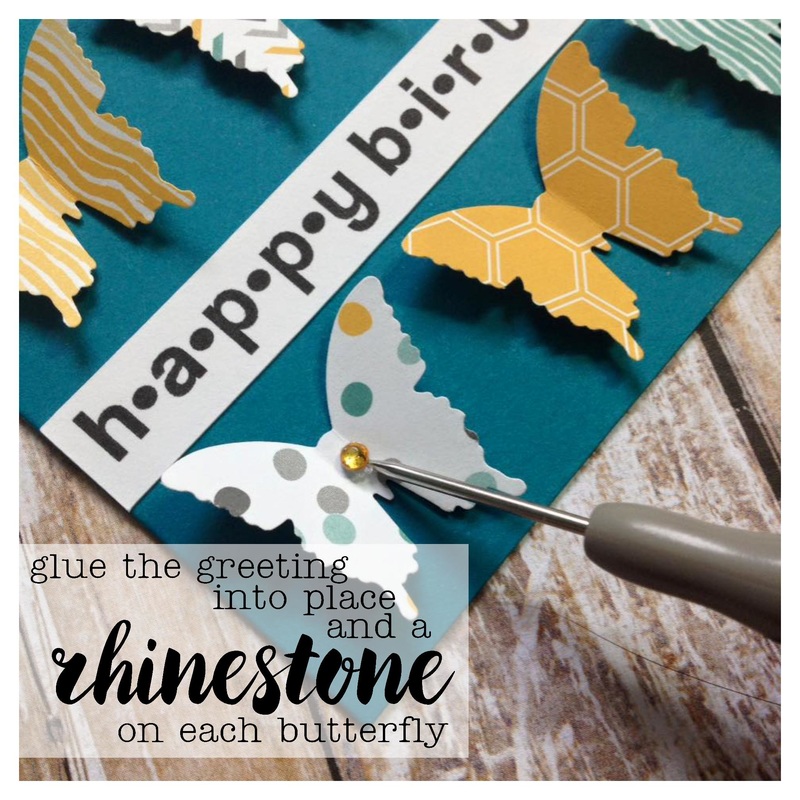 Use the tape runner or adhesive of your choice to glue the greeting tag onto the card. Then place a sticky-back rhinestone in the center of each butterfly. 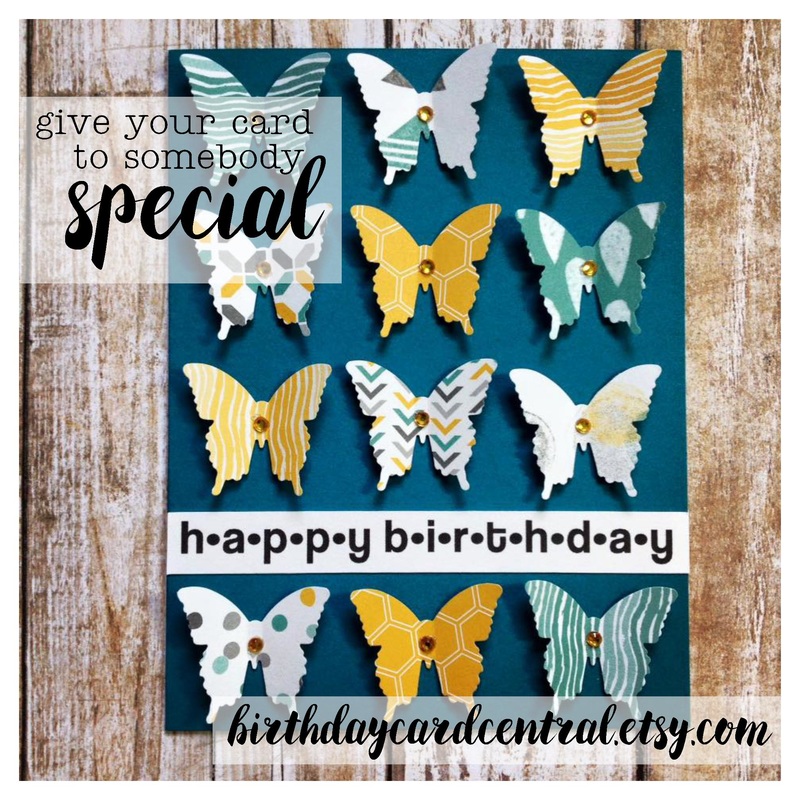 And you're done! Wasn't that easy? If you used a dark cardstock like I did for the notecard, you can glue a white liner inside the card so it's easier to see your written message.
Stay tuned for another card in a few days. It will be inspired by this one, but with hearts instead. ~Jozi |
AuthorCard maker, serial entrepreneur, and all around crafty gal in Saint John NB Canada. Archives
December 2016
CategoriesLike Cardamama / Birthday Card Central on Facebook by clicking the Like button below
|
||||||
 RSS Feed